Woodworker's Journal 2004 Summer, страница 71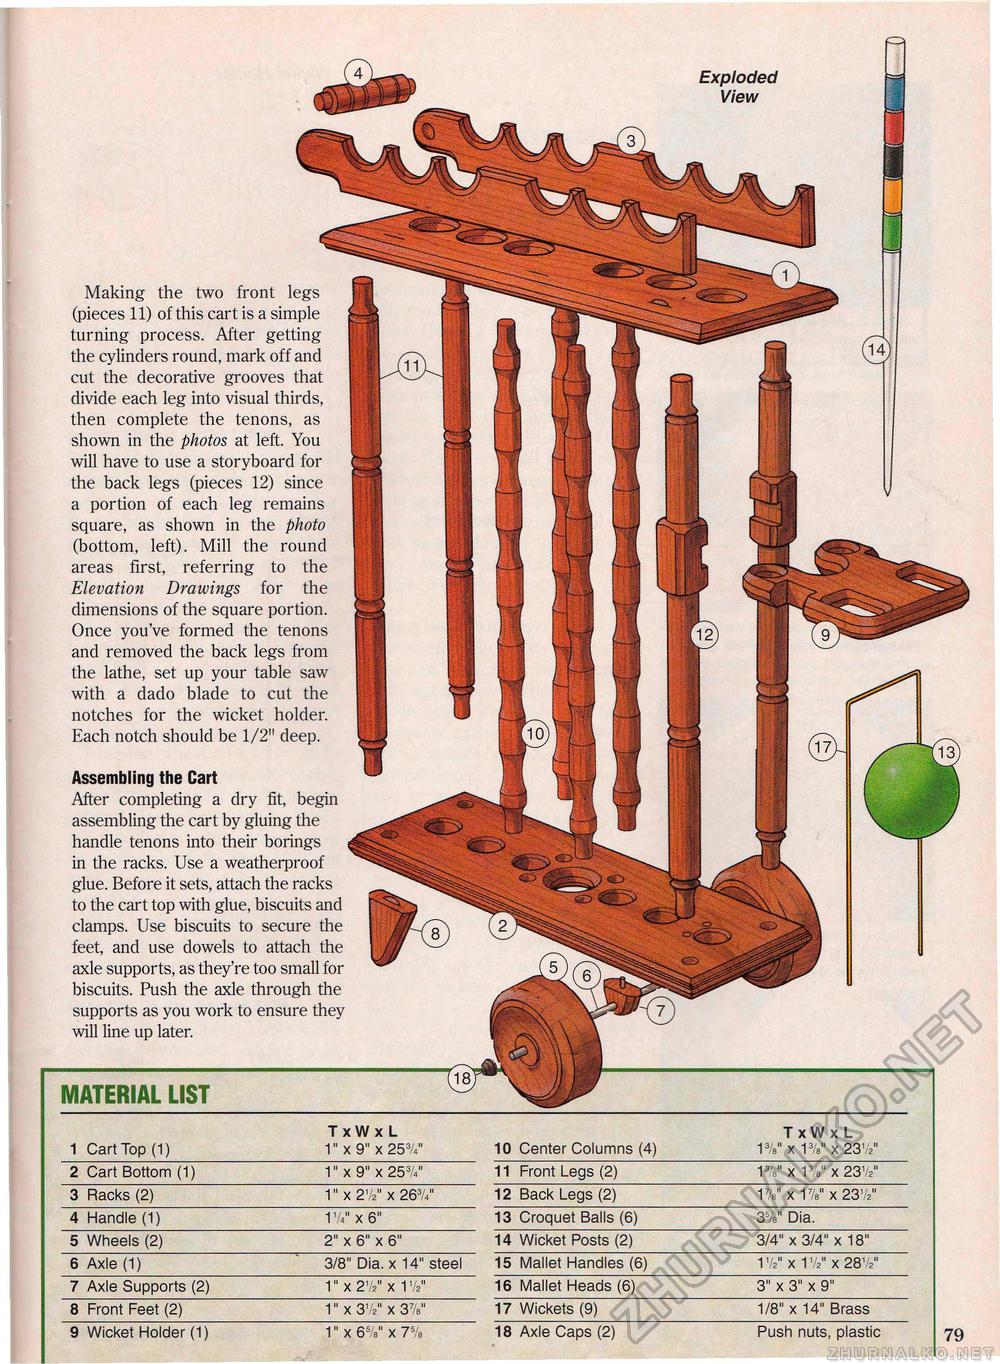
MATERIAL LIST Making the two front legs (pieces 11) of this cart is a simple turning process. After getting the cylinders round, mark off and cut the decorative grooves that divide each leg into visual thirds, then complete the tenons, as shown in the photos at left. You will have to use a storyboard for the back legs (pieces 12) since a portion of each leg remains square, as shown in the photo (bottom, left). Mill the round areas first, referring to the Elevation Drawings for the dimensions of the square portion. Once you've formed the tenons and removed the back legs from the lathe, set up your table saw with a dado blade to cut the notches for the wicket holder. Each notch should be 1/2" deep. Assembling the Cart After completing a dry fit, begin assembling the cart by gluing the handle tenons into their borings in the racks. Use a weatherproof glue. Before it sets, attach the racks to the cart top with glue, biscuits and clamps. Use biscuits to secure the feet, and use dowels to attach the axle supports, as they're too small for biscuits. Push the axle through the supports as you work to ensure they will line up later. Exploded View |


